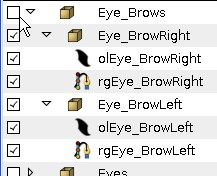
You can disable the involved layers and then they are not rendered at all (click its checkbox in the layer list to disable them). They are not visible but its ducks are visible and can be manipulated.
-G
if i’m understanding right, are you rendering and modifying your scene at the same time? why don’t you try some of this:
1.- Rendering dialog allows rendering a certain portion of your animation, from time Y to time X.
2.- Divide your animation into various canvases, then call for them in a single root document.
3.- Use the command line render process, if the problem is the amount of time it takes for rendering your animation this will makes thing slightly faster. btw, is faster rendering a sequence of PNG images and import them into any program for Video Editing, KDEn Live, LiVES, Blender’s Sequence editor for example.
4.- This last is something i tried only one time, but didn’t work, this was long ago so i don’t know if at this point works, in the view-port window you have the status dialog at the bottom of it, when you are editing or rendering or something you can notice by looking at it, at the opposite side but still at the bottom of the window, you have a button reload and an ‘X’ one which becomes available for stopping rendering progress, as i told you it didn’t work when i used it as it did nothing, the file kept rendering somehow successfully.
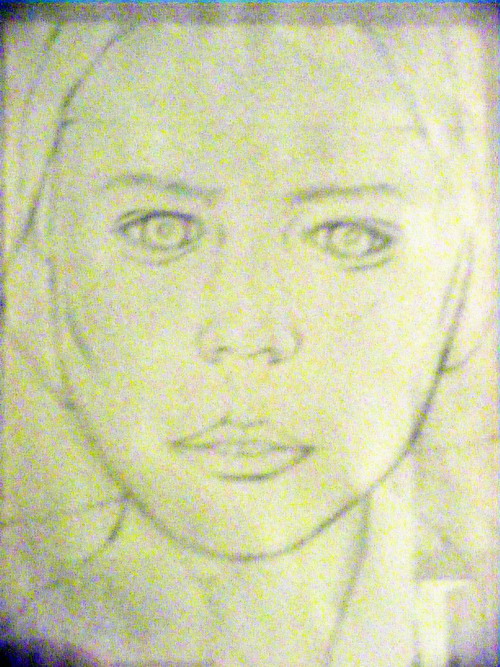
At the moment I’m working on a single frame, but I need to trace a big image drawn by my wife.
I’m a newbie how can I make a Root document
In future it will be usefull.
Thanks because a new idea has pop up in my mind…
I will break the big image in tiles and different files so tracing image will be faster
A little crooked but I think it can work… other ideas?
for better Synfig performance…
It seems that the rendering engine renderize all the image everytime I modify an obj.
Maybe a rendering mechanism that renderize only the area of the modified obj make faster Synfig
Something like the rendering system adopted for windows in Graphical OSs that eg render only a closed window background…
I note this
It didn’t work I think, it is always disabled.
Maybe I’m not able to make it work…
It is supposed that Synfig Studio only render the portion of image that is shown in the canvas window. Work with a smaller canvas window and pan and zoom when needed.
For curiosity, what’s the image format -jpg, png-tiff- and the size of the image to be traced? (pixels and bytes)
I’ve never have troubles of performance tracing an image due to the image itself… Maybe you keep enabled all the effect layers that are causing the slow render? (blurs, distortions, supersample etc.). Once traced a portion of image you can disable it to continue tracing others.
-G
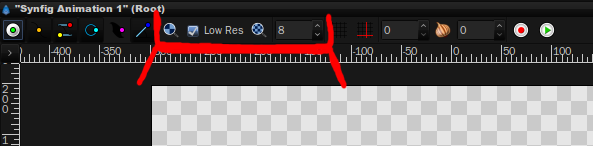
well, now i think you are actually talking about the performance of Synfig at working with it rater than rendering a file for exporting purposes, for that you can help yourself with this panel (latest Synfig Build)
As you see, everything is underlined by the red tint is for improve performance at working with Synfig, starting by the magnifier glass with big squares inside icons, reduce amount of pixels in view-port this is mostly if you project becomes very loaded with graphics or for working you just don’t need a big resolution, still you can zoom as much as you want to work with details, in the other hand, you have the same icon but with smaller squares, this gives you the idea that the resolution can be increased and so the amount of pixels for display. The check-box clearly tells that a lower resolution, more intended for editing and working is enabled, if you always want to have a ‘preview’ of how your current progress looks just disable ‘Low Res’ and your screen will display a higher quality version of your current project, to keep working just enable it again. lastly, you have a number 8 by default inside an input box, this is the quality of your current display, the lower the number, the higher the quality, setting 1 to the quality will make your screen display the best higher resolution, while choosing 10 as your quality will disable layer effects and gradients and some more things, this is very useful when you have a heavy composition of layer effects and other elements.
On a side note, the options in panel are exclusively for performance at working with Synfig Studio and will not affect the final result of your animation/project, the rendering settings can be set at rendering dialog window which you can open anytime.
oh ye. a final advice, at this stage of Synfig is perfectly capable of being an excellent tracing tool, i myself made various project in it for the fancy effects it can achieve in no time, but you would want to use something more familiar for tracing your draw, so you might want to use InkScape, Synfig can import files in .SVG format with a good accuracy.
Now I have good performance also with insane zoom see attach.
Using it will experience the best…
The only things is that Synfig doesn’t memorize the setted options with last save.
e.g.:Zoom, Focus Position (where i work in the image), Magnifier options and generally the tool bar settings settted.
About trace, thanx for suggestions, but Synfing is the best and always will be more!
I look forward tools for tracing…
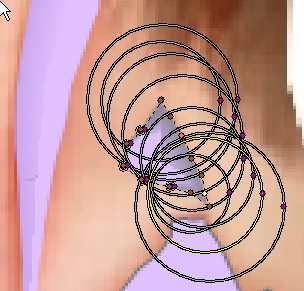
When I work with many points close I have difficulty in selecting the circle relative to the selected point.
To facilitate what is the circle on the selected point, perhaps it would be useful to highlight the corresponding circle even with the same color of the selected point (see the attach Insane…)


 see attach.

 (see the attach Insane…)