Particle exporter and firework example

Hello there!

I am going to share some of my experience with particle template and that’ll result in a long post. So brace yourself :wink:

Well… I was trying to achieve a simple task - make a firework with Synfig. Let’s see what we need to get this task done:

  1. We have to draw some firework rockets. More is better, because what a firework with only one rocket? It’s a lame firework.
  2. The rockets should throw away some neat particles while they fly. It’s not necessary , but it will make firework look better.
  3. After the rocket blew itself up the flash of light should follow.
  4. And lastly, after flash we see cool particles falling down.

Synfig has an awesome particle template (thanks, Genete!) that we could use for that, but unfortunately it has some limits:

  • You can’t copy it to your existing project, because the template is complex.
  • You can’t move the particle layer in other groups.
  • You can’t make more than one particle layer so it’s not possible to have, let’s say, star field and falling snow in the same scene.

After some digging in the internals of sif format (XML) I discovered that it is possible (and quite simple) to export a particle layer to other animations. So I wrote a script that can do the job. Sadly, I am not a coder so script itself is an awful mess of Perl+bat, but it works… sort of. With this script you can export as many particle layers as you want to your existent animation. If you want to try it, here is some explanation of how to use it:

  1. Download ‘SPE.exe’ (SynfigParticleExporter :slight_smile:) script from this link: onedrive.live.com/redir?resid=D … file%2cexe
  2. Run it, you will see a scary console script. First, type a path to your animation. It should be a sif or sifz file. The new sfg format is not supported yet. When ready, press Enter to accept your input.
  3. Now it asks you how many particle layers you want to create. Enter a number here, like 2.
  4. Now you have to enter ‘Where-to-Place’ groups. My English is not good so I couldn’t figure out how to correctly call it… Anyway, this parameter specifies what group a particle layer should belong to. So if you have the following groups in your animation:
  • Root canvas
    |— + Rocket1
    |------ + Flash
    |— + BKG
    Then specifying ‘Where-to-Place’ groups as Rocket1,BKG will place the first particle layer in group Rocket1, the second particle layer in group BKG and the third one will be placed in a root canvas above Rocket1 group. This parameter is case-sensitive. Rocket1 is not equal to ROCKET1.
  1. On the next screen script will ask you for confirmation, press Y if everything is all right.
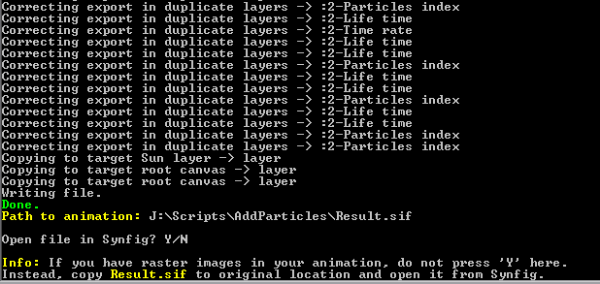
  2. Then you will see some messages (example in the attachment).
    Check there’re no errors or some strange output and press Y to open the new generated file in Synfig. If file opened successfully and you’re satisfied with the result - save the animation to your working folder, because now it’s in the script folder, named Result.sif.

If file opened successfully, you will see the new layers named like this: Particles, 1-Particles, 2-Particles, etc. Description of their values you can find here: wiki.synfig.org/wiki/Particles_V2.0
Some drawbacks of this script:

  • All particle layers have the same random GUID, so their randomness is the same between particle layers. I guess I can fix it easily.
  • Script is not user-friendly. It doesn’t have a GUI.
  • I am afraid that script can mess up the XML structure of a resulted sif file (not your original one) sometimes during to my bad programming skills.
    The script was tested on Windows 7 and 8.1. In theory, it should also work on Windows XP.

With a good particle system you can implement a great amount of cool effects. Some obvious are: snow, rain, fountain water drops, fireworks, other explosion effects, magic effects. Some more complex: star field, dust, clouds, grass. And I personally think Synfig should have a good build in particle layer that you could add through the usual menu without a help of some scripts.

Off-topic: When I was working on the animation itself, I tried to use “Motion blur” layer to make effects a bit smoother, but I didn’t find any documentation on the subject. So it was me and those scary parameters as ‘Aperture’ and ‘Subsamples Factor’ that I don’t clearly understand because I am an amateur artist and it’s really hard for me when there’s no good text+screenshots+source articles. So again, I would like to address the lack of documentation here…

Simple firework example: youtube.com/watch?v=klen-xudWqs
Sources: onedrive.live.com/redir?resid=D … file%2czip

UPDATE 21.09.2015: New version of particle exporter, see this post for details: viewtopic.php?f=8&t=9076&p=29841#p29841
CorrectOutput.png

1 Like

Hi!
Wow! :open_mouth: Someone has been very busy. :smiley: Nice work. You did a great job delving into this. I really have to look into the particle stuff. It would be nice if we would get some default settings for typical particle use like plain rain and snow, etc. That way a user would not have to reinvent the wheel every time he or she wants to make use of the particle system. Again nice work.
Greetz!

Awesome result !

do you think you can write a python version of your plugin to include it direclty into synfig (minimal) pluginssystem ? (the main advantage is that your work will be crossplatform!)

Thanks, man! It wasn’t hard to achieve, actually.

Nope. I don’t know Python and studying a new programming language is not what I want to do next. I plan to open source of the script, just have to clean it up a bit before uploading.

Wow!
It is great that the limitation of the particle monster I created were finally suppressed! Great Work!

I’ve not tested the script or opened the demo but I would give one little improvement:
The particles thrown during rocket traveling before explosion seems to be tied to the rocket itself. It would be much better IMHO if you set “Free floating Off” = false.

Just one final word. I tried several times to re-work the template (create it from scratch again) and never could… It is very complex to deb understood again to my, now rusty, brain… :slight_smile:
-G

Thanks! I tried to dig a bit into the particle template too, but got scared very quickly :slight_smile:

“Free floating Off” is actually set to false… But “Life time” is set to a low value - 1s. If I increase it, the rocket’s tail will be very long and I don’t think it looks good.

I uploaded the source of the script, link: onedrive.live.com/redir?resid=d … =file%2cpl
If someone could re-write it the right way (as a Synfig plugin like d.j.a.y suggested) it would be cool.

Hi!
I used an existing little python script and Genete’s particle template to try and make a plug-in that can add one or more particle layers into an existing synfig animation. So far it seems to work better then I anticipated. Can it add a particle layer? Yes. Yay! Can it add more then one, two, three particle layers? Yes. Yay! Can I group the added particle layers into other groups. Yes! Yay! Can I modify the parameters of the added particle layers? Yes! Yay. Exept… little bug for now. :confused: : when I try to modify the number of particles, then the number of particles of all added particle layers get modified also. Any help fixing this would be cool.
Greetz!
add-particle-layer.zip (7.41 KB)

You need to have one Particle Index value node for each particle layer. It seems you haven’t renamed it properly so the index parameter used for the duplicate layer is all the same (and so, all the layers have the same number of particles)
-G

good work so far !!! hummm … another great feature for the V1 ??? :slight_smile:

Hi!
Yes, I know, but when I change the name of the Particle Index Value node into, for example (stk) Particle Index and I add a new first layer, then it works and the new particle layer gets the (stk1) Particle index. However, when I want to add a second layer, one should assume that the script makes a (stk2) Particle index, but instead it gives an error. Guess I have to do some more python xml parsing study, lol.
Greetz!

Good work!

I looked into your code. It seems that my skills in python are rusty! :blush:

I insist that you use lxml:
lxml.de/
Or something similar, unless there is a reason for not use it?

My little recommendation is to put more comments in your code.

Hi!
My python skills are non existent. :laughing: :laughing: I only make cartoons and comics. Regarding to python, I just started to learn it and barely finished the “Hello world” section, so feel free to call me an uber noob. I did not write the script, but just adjusted the synfig file in order to work with it and to my surprise it worked :open_mouth: :laughing: . Now that it actually has a bug, I have to dig in it a little further :unamused: . Any information is welcome, so thanks for the link. It seems that the duplicate layer automatically exports a value when the layer is created and the layer also uses a unique guid. The current script uses the same guid for each created duplicate layer. I think that is where the bug is located.
Greetz!

Hi darkspace,

Thank you for trying to write a plugin the right way! Sorry I could not post any information earlier, I still can’t access Synfig site from my home computer and it’s bloody frustrating.

I can’t help you with Python programming, but I’ll write what you have to do to make the script work (describe the logic):

1. You have the particle template (PT) and the target animation (TG). You already copied the first particle layer in TG, because it’s easy (no need to modify anything).
2. To export the second PT layer you should modify ‘defs’ structure in the PT as follows:
a. Rename all ‘id’ attributes. E.g. the first PT layer have the node with id=“Life time”, you have to rename it to something different, like id=“1-Life time”, so user can change the second PT layer without affecting the first one.
b. Change ‘to’ attribute in the ‘duplicate’ node the same way.
c. Generate a new GUID for duplicate layer (attribute ‘guid’).
We’re done with defs.
3. Now you have to duplicate ‘Particle’ group itself. To do this:
a. Duplicate the whole group.
b. Search for all ‘guid’ attributes and recreate GUID for them.
c. Find all linked attributes. It can be a bit difficult. You have to search for all attributes that starts with ‘:’ symbol, if so, then value is linked. After finding replace attribute with the one from defs structure. E.g. attribute link=":Life time" should be replaced with link=":1-Life time", see 2.a.
And we’re done with ‘Particle’ group.

I also attached a sif file with only two particle layers, so you can check out how the resulted XML should look like. Hope this information is helpful.
PTexample.sif (184 KB)

Hi Svarov,
Thank you for the extra info. I am learning Python, xml and elementtree, making 2 comics and a short animation and digging into all the new gooddies of synfig 1.0 and I am creating more free characters to use with Synfig. So it’s all going a little slow :laughing: . Most of your logical steps are already in my flow chart diagram (thanks to reading your perl script) I think the current problem I have now is in point 3b. I think I did not do a search for other guids and create new ones (only for the duplicate layer).
Greetz!

Hey there friends,

I’ve finally improved my script that exports particle template to existent animation (it’s still perl, though). In this version:

  1. All exported particle templates now have different seed values. So now each copy of template (first one too) is not the same and produces visually different behavior (more random).
  2. BAT script has been improved too and now is more user-friendly. It’s still a scary console script but, at least, you can choose your animation through the graphical interface (standard Windows ‘Choose a file’ dialog).
  3. Some minor changes in logic to handle XML a little better (but errors are still possible in a complex sif/sifz files).

And to prove awesomeness of the particle template, below is the link to star field animation done with particles only. It’s 300 particles in summary and each one has its own brightness, outer radius, inner radius and angle that dynamically changes over time without any keyframes. I am pretty sure I could do better if I applied some raster work combined with more distortions, but Synfig started running slow and I decided to stop (rendering process took 12 hours for 1 minute of animation).

Animation (watch in fullscreen to see how stars randomly changes): youtu.be/DRmPQXU7vzY
Source: 1drv.ms/1Wdb0Gr

P.S. I really appreciate the current direction for render optimization, it’s what Synfig really needs now.