One of the problem that the cartoon animator usually has is the lipsync. There are several ways to solve that in most of the animation programs. With Synfig you can use Papagayo to create a reference phoneme sequence and import that sequence to Synfig as a image sequence. Later you can manually insert keyframes to make a smooth transition lip synchronization. On the other hand, one of the most researched technique in animation is create head turns easily. In Synfig you can create head turn positions using keyframes and reuse them in any place of the animation. See this animation I did: youtube.com/watch?v=W3ctTJQ9koc
The problem comes when you try to do both techniques at the same time. If you use keyfrmes for head turn and also keyframes for lip sync you cannot combine them. If you turn the head you cannot turn the mouth too. It would stay at the original turn positon. Although you create several keyframes for the mouth position for each phoneme it would be very complicated to place both set of keyframes in the same place (you cannot place two keyframes in the same frame in the same canvas among the extra work of create ANY intermediate mouth position.
I’ve figured a technique that allows create a guided set of phonemes for the extreme positions of each head turn keyframes. The idea is substitute the keyframes of the head turn by the following technique:
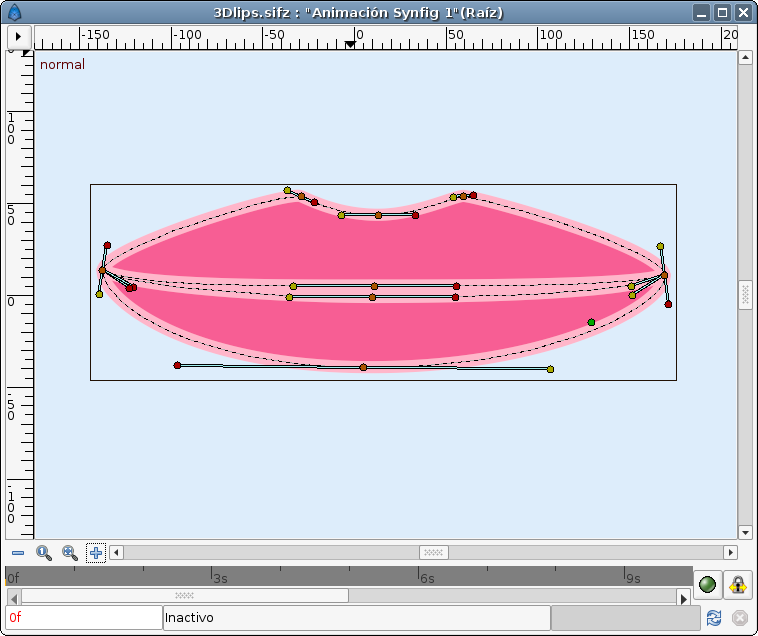
- Create one of your lips turn view. I’ve started with the front view.
I’ve tried to minimize the amount of points of the lips to make the work less hard this first time. - Once you’ve created the front view then duplicate the inline canvas and move the vertices and the tangents to achieve a side (it is close to a 3/4 view). It would be the reference image. I’ve created it in blue to allow easy distinction from the one what’s going to be managed.
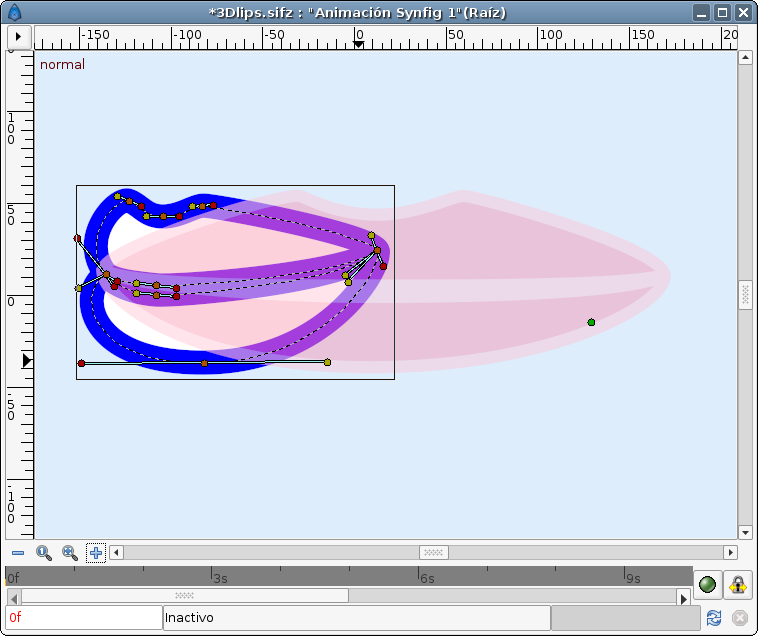
Notice that the left corner of the mouth has its tangents split to allow represent the lip edge in the side view. Also notice that I’ve not split the tangents of the to vertices of the lips to have less work to do. - Once you have the two poses you have to create new blines that connect those vertices and tangents (tangents have special treatment) form the front status to the left status. All those blines are shown in the following image. I’ve drawn then in red color and purple for the lips corners.
Draw the blines from the front view to the side view. It would help to connect all the movements to the same parameter. - Now you have to “link to bline” each vertex of the front view to the red/purple guide bline you have created. Don’t link the tangent, only the vertex. Each time you link a vertex to a bline it produces a sub parameter called Amount. This parameter controls the position of the vertex on the bline. When the Amount parameter goes from 0.0 to 1.0 it runs along the bline position. If you carefully have placed the guide blines (red and purple) to start on the front view position and end in the side view position of its corresponding vertex you have done properly the job. Now select one of that Amount sub parameters and export it. GIve it a name and by selecting all the other Amount sub parameters from the the rest of vertices connect them all to the just exported one. In this way you can control the all the vertices positions from front to side view with only one parameter.
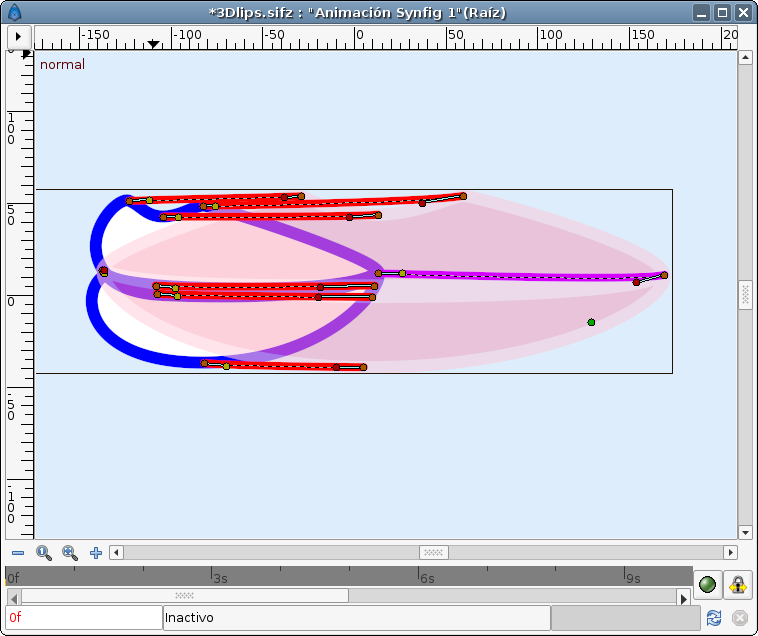
- Obviously the shape of the lips in the side view is not perfect until you don’t do something similar for the tangents. Tangents are a little different. you have to draw a bline that starts with the same tangent (angle and radius) of one vertex of the front view and ends with the same tangent (angle and radius) of the corresponding vertex of the side view. But to properly set the guide bline for tangent you have also to place properly the relative position of the initial and end vertex of the guide bilne. It is critical to define the intermediate tangents from one view to other. The intermediate tangent of a two vertices bline depends not only on the extreme tangents but also on the relative position of both vertices. Its absolute position is not relevant (it was relevant for the guide blines of the vertices positions), it is only important the relative position of the initial and end points and the tangent values. Said this here is the image of the guide blines that I’ve created to transform the front tangents o the side tangents.
You can see that they are placed more or less close to the corresponding tangent position to allow easy identification. Later it would be a big mess . Notice also that the positions of the vertices are not arbitrary. They are the proper ones to allow smooth and more or less linear transition between one tangent and the other. To perform this set up properly you can make a rough guide bline draw and after make a link to bline of the corresponding tangent and connect the Amount sub parameter to the exported one, modify the amount parameter (in not animation mode) to help on match the front and side tangents. Remember to modify always and only the guide blines to match the front and side views. If you accidentally modify the linked tangent you’ll produce an undesired offset to the tangent angle and scale. Some tangents are drawn in opssite direction than the guide bline bline is. You have two alternatives reverse the guide bline (by matching the side tangent for the front vertice and viceversa) or reverse the linked tangent (by inserting a 180 DEG offset in the Offset sub parameter).
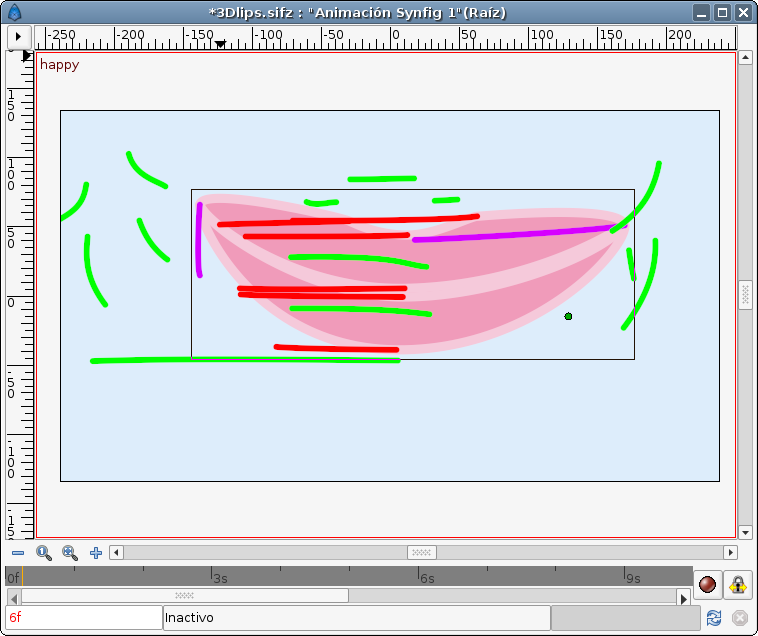
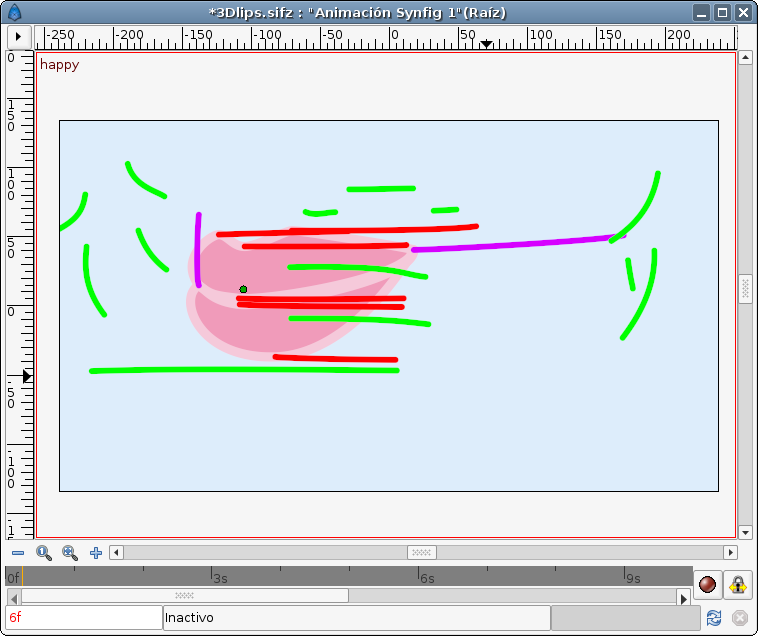
 - Now you have a mouth that can be morphed from front to side view with only the modification of one parameter (the exported Amount). It is time to create the other poses. At frame 0f set the Amount parameter to 0.0. It would point to the front view. Now in animation mode, create a keyframe at frame 0f. Call it “normal”. Go to the frame 6f and create other keyframe. Call it “smile”.
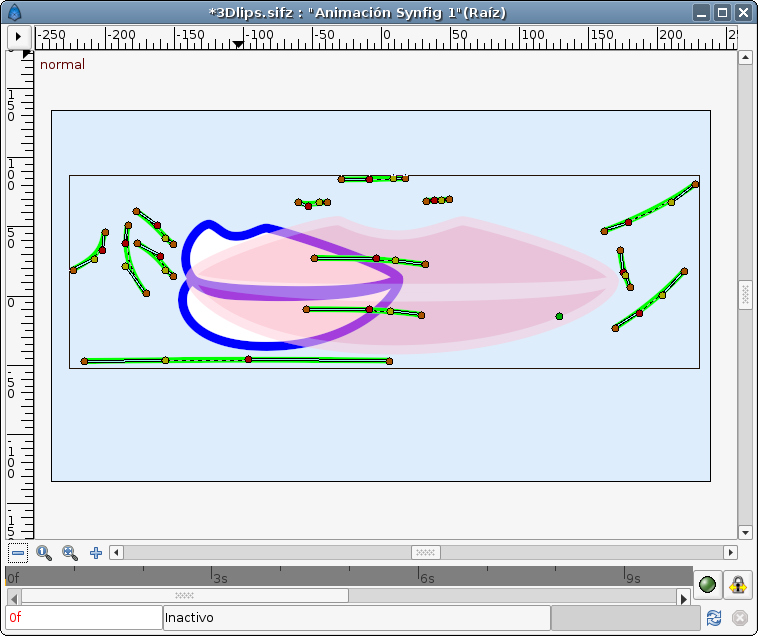
- Now by modifying the blines (position for the red and purple and tangents and relative positions for the green ones) morph the front and the side views to a smiling mouth. This is the result of the guide blines and the front and side views.
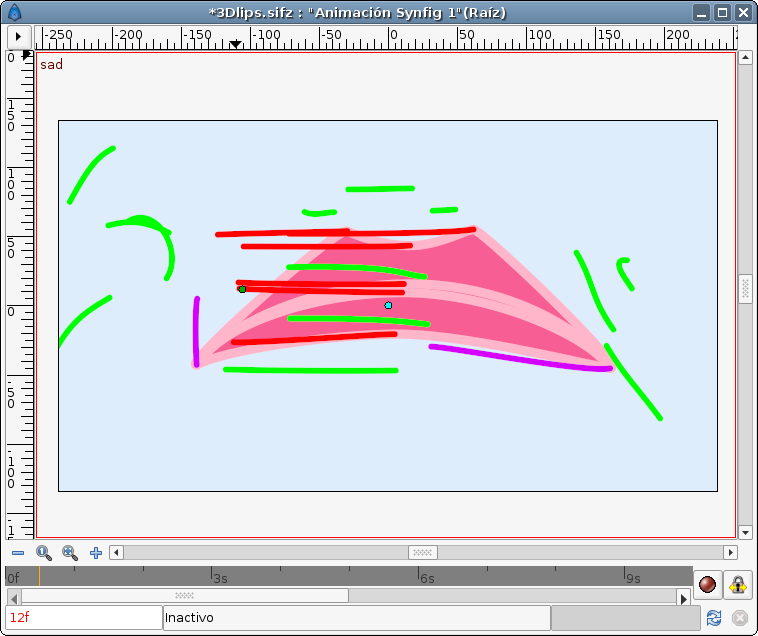
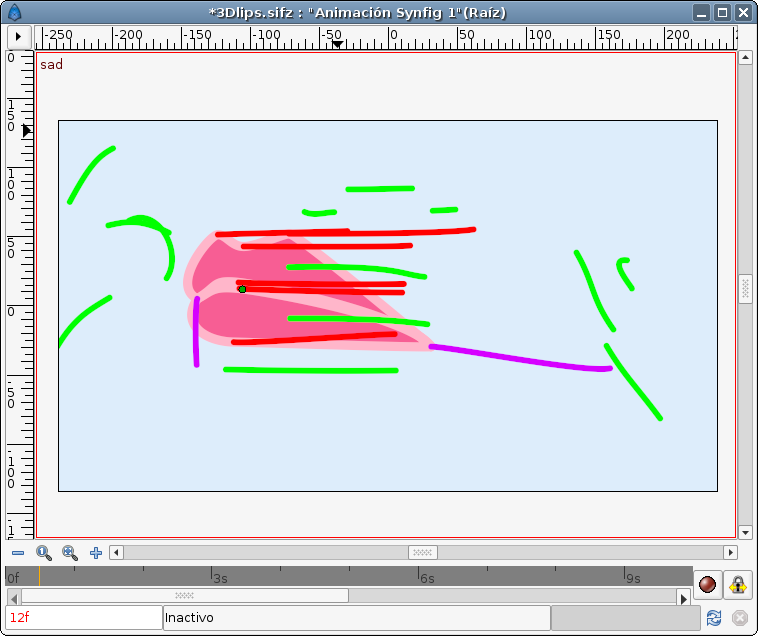
 Repeat the same for a “sad” pose. Do it in a different frame. Repeat the process to all the mouth phonemes or poses.
- Now just animate it!. Go other frames and insert duplications of the stored keyframes. Don’t worry of if it is in the front position. Just insert the phonemes. Once done select the exported amount parameter (I’ve called “c” in my file) and make right click Disconnect. It would clean all the waypoints produced by the insertion of the keyframes. Now set the Lock keyframes button to Lock none. At the desired positions modify the Amount parameter (“c” in my case) to turn the mouth to the position you want. The poses and phonemes of the mouth would be preserved.

I’ve not done any phoneme because I was so excited on this technique that I want to share with you as soon as possible. Also the sample would need some better preparation for a side to side turn.
Finally the sample file.
3Dlips.sifz (52.7 KB)
Enjoy! 
-G
 Good job.