Greetings to everyone !
I am completely new to animation and synfig, so my question may be very very basic.
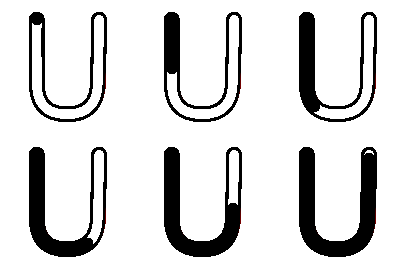
The animation I would like to create is very simple: a letter of the alphabet being drawn. Preferably the letter should be present in the beginning as an an unfilled outline and then it should get filled according to the correct way the letter should be written by hand.
I would like to import a bitmap of the outlined letter into synfig and then animate the writing process. A nice addition would be to add the drawing tool filling the figure. Like a pencil pen or brush doing the actual filling of the letter.
animating the writing process without the outline is also ok. That is start with nothing and end up with a written letter.
The purpose of this is to create a series of videos for teaching Sanskrit students how to write the Devanagari alphabet.
I would be thankful if anyone could either instruct me how to do that, or refer me to where I could find instructions regarding such animation tasks.
Many thanks,
Youval
You might be able to do that by animating the outline width. (info about outline layer here.) I’m still learning Synfig so excuse my lack of detailed information on how to do this.
Hi Youval,
First of all, welcome to the forums. It is great to hear that new people is joining us.
Second I want to tell you that what you want, not only is possible but you’ll enjoy it a lot. Latest Synfig version is specially suited for that kind of task.
First thing you should do is to download and install the latest Synfig Studio version. You will find it here. Although we support Windows, Mac and Linux versions, we preferably refer to the Linux version because it is the platform where we firstly develop the application.
Second thing is get hand on the work!
You’re asking for a outlined letter and then later a brush or pencil would fill it showing how to write it. For this task we would get use of the new Advanced Outline Layer. This new type of layer allows you to easily animate the exposure of the outline along its path.
To emulate the outline of the letter and to emulate its filling you’ll need three advanced outlines. Let’s call them ‘Original’ Outline, Expanded Outline, Hole Outline. The three outlines will share the same geometry (the one called BLine List or List of BlinePoints). They will not share the same width because of this:
The Original Outline will be on top of the other two. Below will be the Hole Outline. It is static and will remove the portion of hole of the last layer (the Expanded one) that will be static too. Let me show you with an example:

To achieve this effect you have to:
- Create the letter with the advanced outline layer. If you need more sections of letter due to the different strokes then you have more layers. Call it Original
- Once created the path of the letter give it the width to match the unfilled part.
- Duplicate the layer and place the copy below. That will be the Hole one.
- Duplicate the Hole one again and you’ll have the contour of the letter. Let’s call it Expanded.
- To get the Expanded and set its ‘Expand’ parameter to something bigger than 0. It will expand the outline.
- Go to the Hole layer and set its ‘Blend Method’ parameter to ‘Alpha Over’. It will produce a hole on the Expanded one. The hole is not yet visible because the Original one is still visible.
- Go to the Original layer and make visible the widhtpoints clicking on the width toggle icon on the canvas window or pressing ALT-5. It will show two widthpoints.
8.) Set one of the widthpoints at the start of the stroke and the other at the end of the stroke. Right click on the end widthpoint’s duck and choose Set Side After -> Rounded - Switch to Animate Mode.
- Add a keyframe a the start of the letter exposure. Typically at 0f. Call the keyframe ‘Start’.
- Set the time to the final time where you want the letter to be fully exposed. I’ve chosen 3s. Add a keyframe there. Call it ‘End’
- Click on the ‘Jump’ label of the ‘Start’ keyframe and you’ll jump to the time of the start keyframe.
- Click and drag the end widhtpoint and place it on top of the start widthpoint. You’re done!
- Set Animation Mode off.
I assume that you have a basic knowledge of the principles of animation with Synfig. If not is the case then you have to learn that first and then follow the recipe again.
Good luck!!! and pleas let us know your progresses!
-G
U.sifz (1.54 KB)
Nice write up! Good info.
Many thanks Genete! This is exactly the effect I’m after.
I’m going to play with this feature this week!
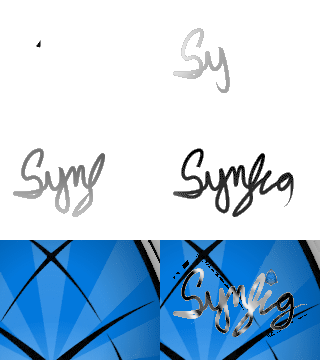
an example of animated writing
fully inspirated from http://synfig.org/forums/viewtopic.php?f=3&t=2803&sid=8d8b66b8c061c1969fb7743798c9da5f%20travel%20path&sid=8d8b66b8c061c1969fb7743798c9da5f
animated gif attached is not trully representative
see(:ya!
note : i will probably write a tut’on it for my little frenchy tuts page http://transmission-libre.org/tutos/ and why not for synfig doc if its usefull
advancedoutline-synfig.zip (324 KB)

Quite cool example d.j.a.y!
-G