i’ve been using synfig some months ago and now i’m trying again to get used to it.
i want to animate a logo… it is a flower and i want to make it grow. i used the flower tutorial to remember the usage of synfig and than tried to make the logo animation.
but i have a few questions:
is it true, that there are only key frames for the whole animation or does every “object” has its own keyframes (but i just did not find them?). Because, if changed one objekt (e.g adding new vertices) and then wanted to delete that specific changes by deleting the keyframe, all changes on all objects where gone. if you know blender (or similar software), you problably know what i mean… just keyframes for every objekt…
in the flower tutorial, the petals are getting connected with the stem by linking the vertices together.
the petals are following the stem if it is moved.
i tried very often to do that in my own animation… but it does not work. i tried to first select the green button of the petals and then ctrl-click on the upper vertice of the stem and as it did not work, i tried it the other way… first the vertice and then the green button. id did not work. the stem was sticket to the petal and did not grow because it was allready streched by the petal.
what was wrong?
Keyframes scope is the canvas (the default canvas for a document is the “root” canvas). You can produce keyframes in its own canvas scope if you edit the canvas it is own individual window.
To create a separated canvas you have to export the canvas parameter of a inline canvas (obtained by the encapsulation of layers or by inserting a paste canvas layer).
Waypoints are for each object’s parameter: ie. radius of a circle, vertex of a blinepoint, angle of a rotation layer.
Relative to the problems of your file I see two of them:
You have messed up the petals animation because you did not added the vertices in the right order/ place. To avoid the keyframe automatic creation of waypoints (past or future) check the Lock keyframe page of the wiki (you can find it in the keyframe wiki page given by pabs). On the other hand the stem animation is very well done.
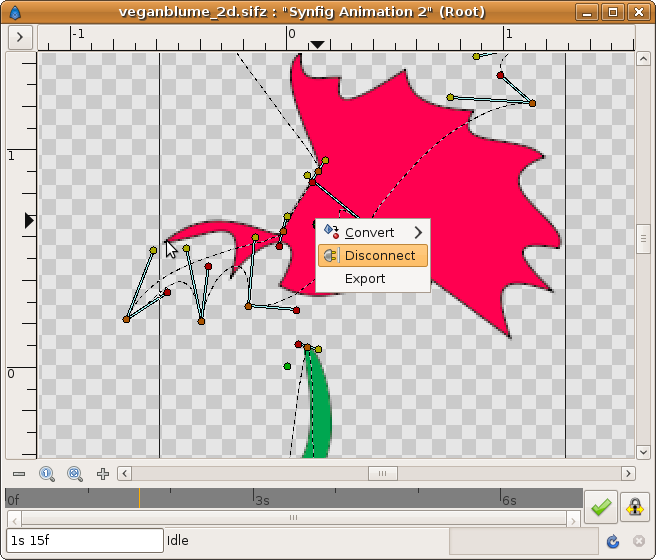
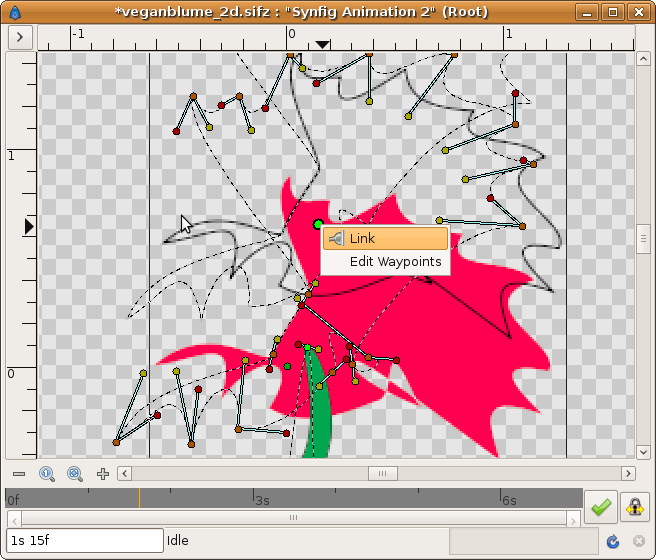
You have to select the origin duck of the petal layer (or the petal outline layer because both are linked) and one of the vertices of the stem layer that you want to link to. The origin duck of the petal layer is green and it is at (0.14,0.6) units approximately. Select both (using CTRL meanwhile you click them) and they become in a higher color. Right click one of them and select link. The problem is that the link command should decide which duck to discard and which one to select as the value for both. In this case the origin of the layer is used and the vertex of the stem is deprecated. To solve that problem you have to unlink the origin of the outline layer and the origin of the region layer of the petals first. Once done you can link the origin of the outline to the vertex of the petal and then the origin of the region to the same vertex. See the screenshots.
I’ve done it at 1s 15f for convenience to see both duck closer. It can be done at any time.
I’ve uploaded the file saved with format 0.61.08 because I don’t know what’s the version you have. Please let me know if you can open the file or not. I don’t use frequently the save as older versions feature.
In the screenshots notice how the ducks implied in the link operation are highlighted.